This Guide is for:
- Super Admin
- Teacher Admin (Full-Access)
- Teacher (Owner Full-Access)
Steps on How to Run Your First Activity Using the Dashboard.
Step 1 – Click the button “Courses” on the left-side navigation.

Step 2 – Click on the course in which the activity is in.

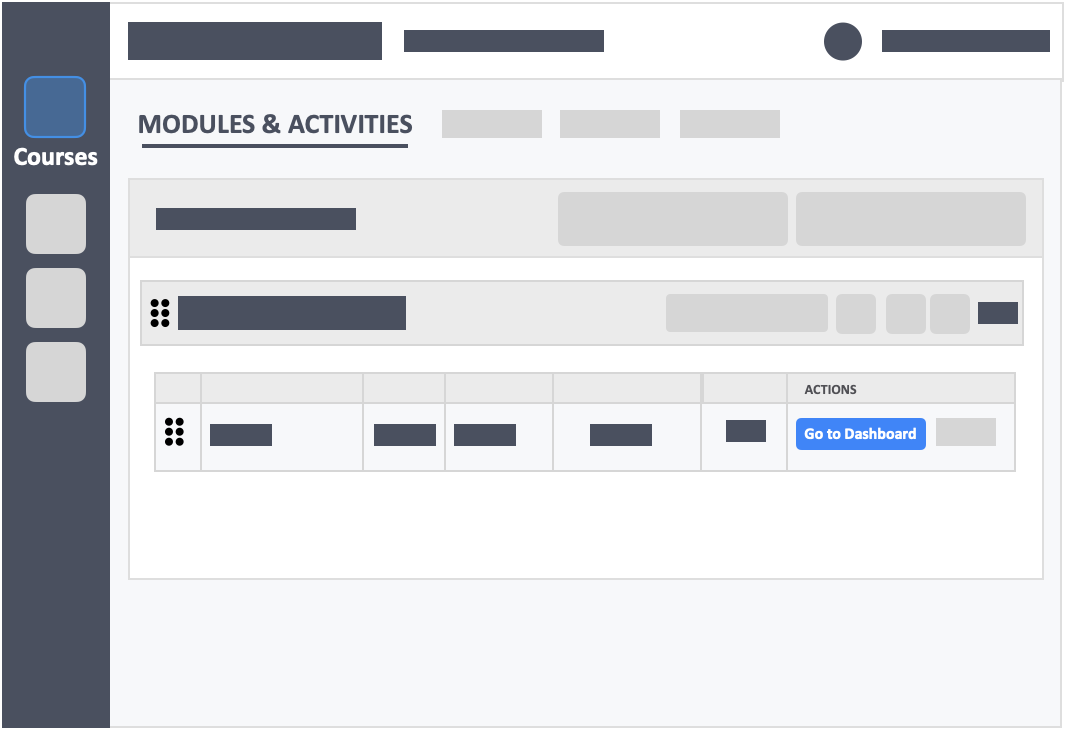
Step 3 – Click the blue button “Go to Dashboard”on the right-side of your actions column of the activity.
Things to note:
- How to run synchronous activities - For synchronous activities, you will need to physically press the start button within the instructors dashboard.
- How to run asynchronous activities - For asynchronous activities, the start period will begin when the activity is published.
- Attendance - You can track learners’ attendance in the attendance panel. Any learner that has clicked to enter your activity will be recorded as present.
- The activity settings will provide you with information about your activity setup. You will need to reset activity to make changes for this section.
- The status box will show the progress of the current learners in this activity.
- As you move downwards on the instructor dashboard, you will encounter the item analysis table which allows you to see the failure and success rates of the activity.
- Moving on you will encounter the student analysis table which allows you see the progress of your learners in the activity. In this section you will also be able to access further details on a learner by learner basis.
- Finally you will have the questions area which will allow you to display the show correct answer and show answer statistics options to learners when you engage class discussions in presentation mode.