This Guide is for:
- Super Admin
- Admin Teacher (Full-Access)
- Teacher (Owner Full-Access)
To integrate InteDashboard with Blackboard you will need to have the admin rights from your organization to modify or add LTI tools to your Blackboard account.
You will also need to have a course created on InteDashboard, so you can grab the LMS integration details from that course and integrate it those details into Blackboard.
Steps on How to Integrate InteDashboard with Blackboard
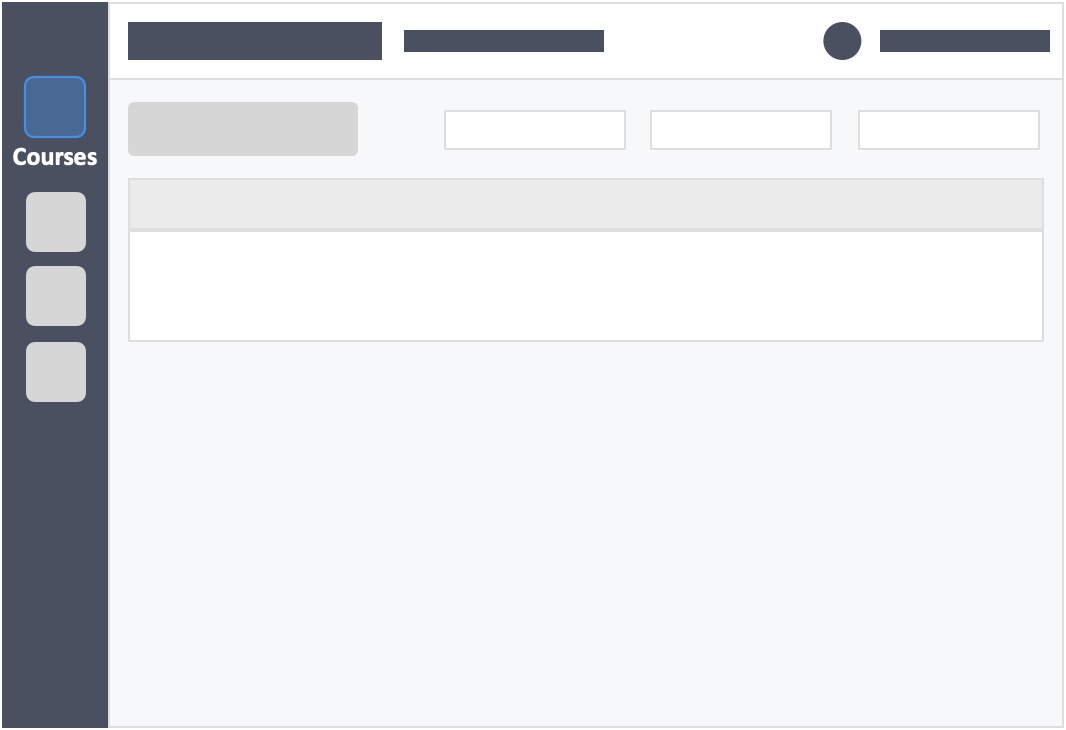
Step 1 – Click the button “Courses” on the left-side navigation.
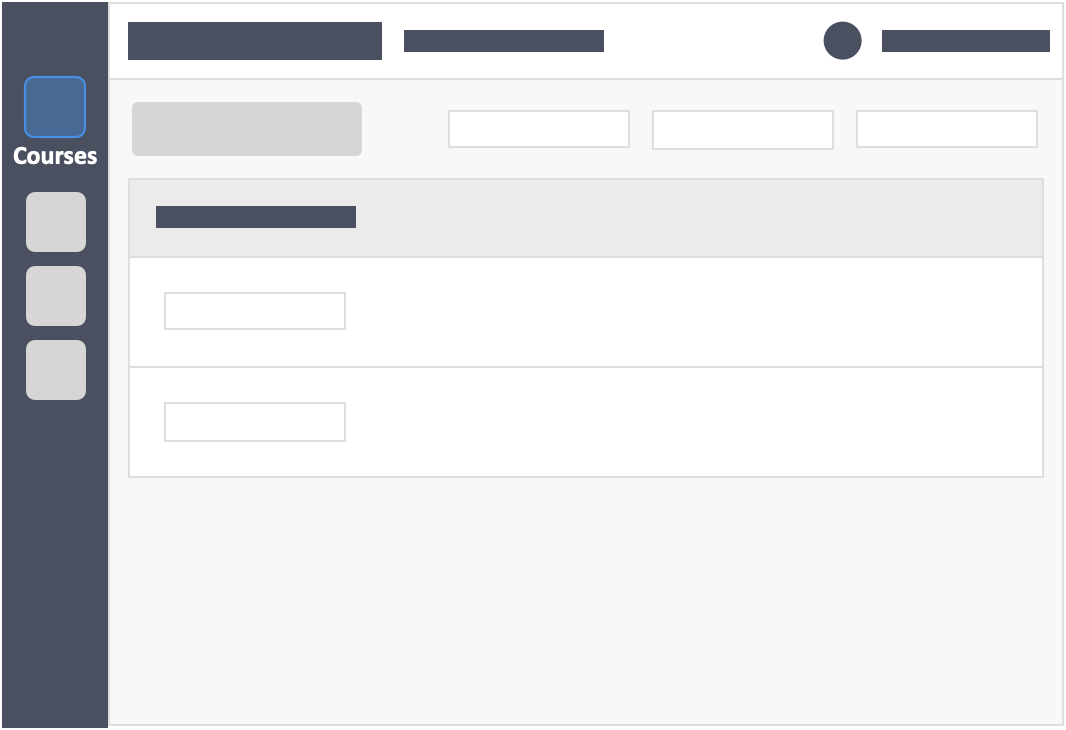
Step 2 – Click the name of the course in which you want to integrate InteDashboard with Blackboard.
Step 3 – Click the “Settings” tab on the top left inside the course.

Step 4 – Go to the “Enrollment Settings” tab.
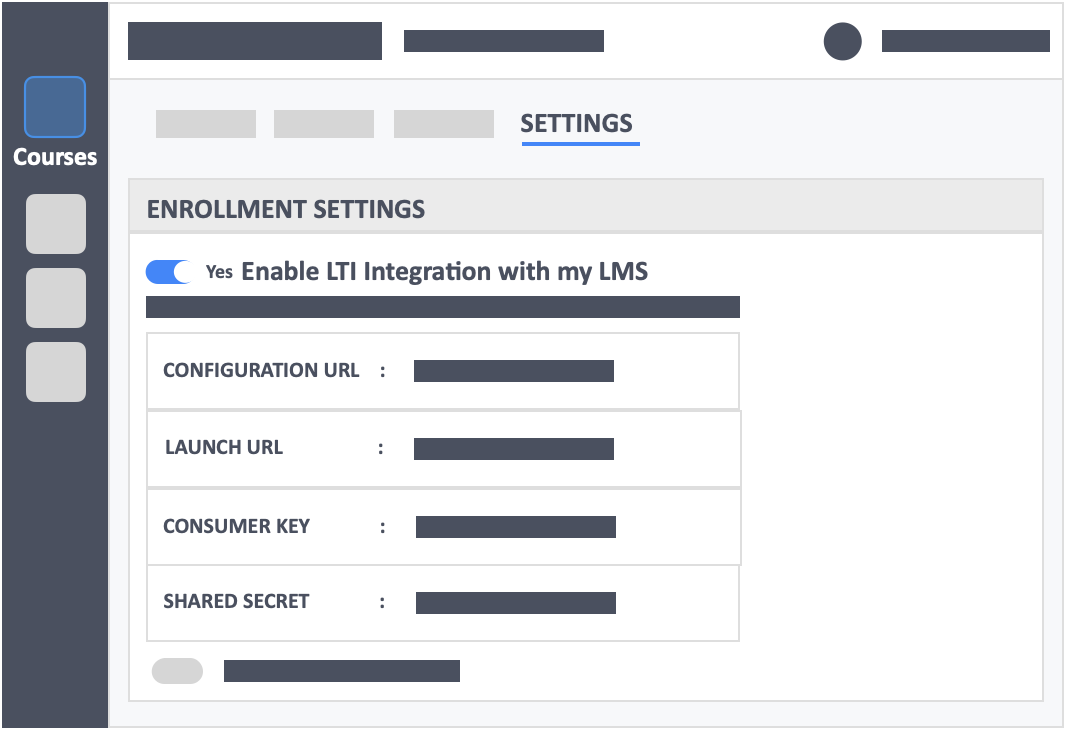
- Keep the page above open, so you can quickly access this data in a few minutes.
Step 5 – Open Blackboard and access the course that you want to integrate InteDashboard with from within Blackboard.
Step 6 – From within your course select “Content” from the left-side course navigation.
Step 7 – Click the “Build Content” button and select “Web Link“.
Step 8 – Key in the following settings.
- Name – InteDashboard
- URL – Add the Launch URL here.
- This Link is to a Tool Provider – Toggle to “Yes”.
- Shared Secret – Copy and paste the “Shared Secret” information from your LMS Integration area on Intedashboard.
- Consumer Key – Copy and paste the “Consumer Key” information from your LMS Integration area on Intedashboard.
- Enable Evaluation – Toggle to “No”.
- Points Possible – Leave this empty.
- Visible to Students – Leave this empty.
- Due Date – Leave this empty.
- Description – Leave this empty.
- Attachments – Leave this empty.
- Web Link Options – Toggle option “Open in New Window” to “Yes”.
- Permit Users to View This Content – Toggle to “Yes”.
- Track Number of Views – Toggle to “Yes”.
- Select Date and Time Restrictions – Leave this empty.
Step 9 – Click the “Submit” button.